
All my friends at seed companies are saying the same thing: They're seeing a HUGE surge in seed sales right now. With an increased desire to grow our own food, and restrictions on shopping at the nursery, it's no wonder we're turning to those miraculous tiny packets of future plants that fly through the mail in little envelopes.
There are probably a bunch of new seed starters out there, and I've put together this guide to help you make the most of your seeds.

How to start seeds
Seeds want to grow, and given the right conditions they'll take care of themselves. Getting the conditions right and keeping them that way can be a challenge though. In this post, I'll go through everything you need to know to successfully start seeds.
Fundamentals
Though there are some special cases, most seeds like the same thing.
They like to be moist, but not wet, without ever drying out, and to be kept around room temperature for a few days to a few weeks. Once they've sprouted, they like lots of light, along with even moisture and mild temperature. As they grow, they need protection from pests, room to grow, and nutrients.
Some seeds prefer to be direct seeded, planted straight out into the garden, while many prefer to be started indoors in pots. Your seed packet will tell which is best.
The rest of this post is about starting your plants from seed in pots or trays to transplant later. For direct seeding, planting your seeds directly into the ground, you can read an older post, here.
Before you start
You'll need to consider 6 elements and gather all your materials before you get started: Seeds; seed-starting mix; containers; water; light; and heat. Here we discuss each one in detail.
1. Seeds.
With literally hundreds of places to buy them, and thousands of varieties available, choosing seeds can be overwhelming.
A few ideas to help you choose:
Choose what you like, not what you think you "should" have. Just because everyone raves about homegrown tomatoes, if you don't like them, don't plant them!
Local is better. Seeds from local seed companies, or saved by keen gardening neighbors will be better adapted to your climate. Over time, as your confidence grows, you can save your own seeds and have plants adapted to grow best in your own yard.
Decide if you'd like to save seeds from what you grow. Open pollinated / heirloom seeds are necessary if you'd like to save seeds. (Heirloom is a sub-category of open pollinated, generally with a longer history and a story attached to where the variety originated.)
Hybrid seeds, the other type of seeds you'll commonly find in seed catalogs, produce plants with specific desirable characteristics (like tasty Sun Gold tomatoes), but plants grown from their seeds are not like their parents. Hybrids are created with the traditional cross-breeding methods humans have been using for millennia, like breeding a horse and a donkey to get a mule.
Open pollinated / heirloom and hybrid can both be organic, and can be used to grow organic crops.
GMO seeds are an entirely different category, and usually aren't available to home gardeners. They are created in a laboratory, by inserting genes from one species into another, like from a fish into corn. They are generally used for large scale agriculture, and are not allowed in organic growing.
Some of our favorite places to get seeds are:
- Hudson Valley Seed Company (East Coast)
- The Living Seed Company (West Coast - cool coastal climate)
- Redwood Seeds (West Coast - foothills microclimates, good for heat and short seasons both.)
- San Diego Seed Company (Coastal Southern California)
- Johnny's Seeds (East Coast)
- Sample Seed Shop (East Coast)
And if that's too much choice, we have a small selection of our favorites available here.
A note on using seeds commonly found in the kitchen (like pumpkin seeds or avocado pits): It's not a great idea to use kitchen seeds if you care about what the plant will eventually produce. They will likely grow, but the fruits they bear are unlikely to be the same as their parents. If all you want is a fun planting activity, however, your kitchen is full of possibilities.
2. Seed Starting Mix
Seeds do best planted in a special medium called seed starting mix. You can make your own (link to video), buy it from us, or find it at any garden center, but whatever you do, don't use regular garden soil, which is too dense and tends to have weed seeds in it. Seed mixes are light and airy, while also retaining moisture to help keep seeds evenly moist without getting soggy.
Look for peat-free mixes. While peat is a good medium for seed starting, it's a very unsustainable resource, being essentially a miniature old-growth forest. And mining peat releases lots of trapped CO2 into the atmosphere.
It's a good idea to mix a bit of your garden soil into your seed starting mix (about a tablespoon for every 4 cups), to inoculate it with the soil bacteria your plants will live with when they go out to the garden. (More on that here)
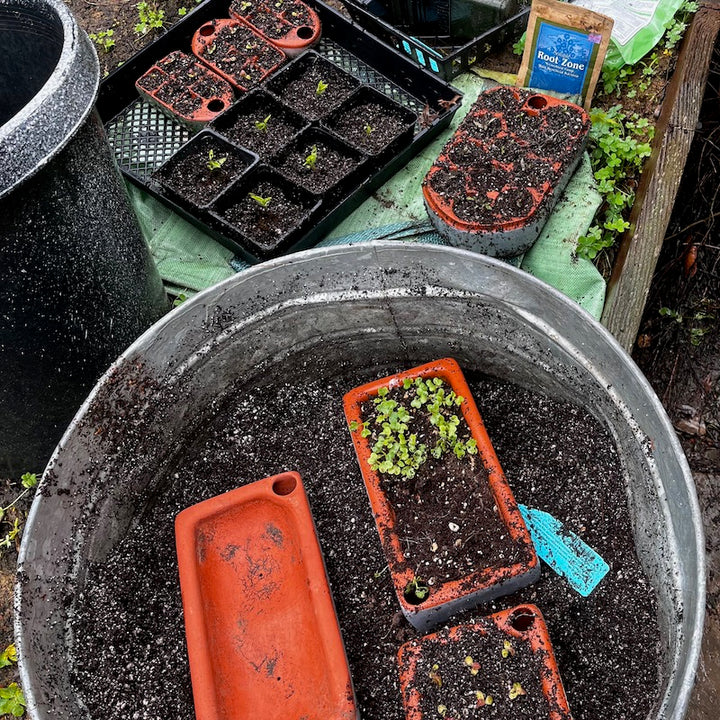
3. Containers
You can use anything from an egg carton to a reused six-pack to one of our self-watering planters. The diy methods are cheap and compostable, or are reusing material that would otherwise go to landfill, but they require diligent, careful watering (see below). Our planters cost more, but last a lifetime, and you only have to remember to water once a week.
4. Water
If you're watering by hand in a diy pot, you'll need to water very gently, a little bit every day, sometimes twice a day in warm weather. To do this, you'll need a fancy watering can with teeny holes that waters very gently, a diy version of the same (a plastic bottle with holes poked in it with a pin works well), or a lot of patience as you dribble water slowly with a measuring cup or spritz with a mister. Keep the seed mix moist but not wet, about like a wrung out sponge.
5. Light
One of the biggest mistakes beginners make is not giving seedlings enough light, causing them to stretch tall and skinny, looking for more light. This makes for weak baby plants prone to disease and tipping over.
You'd be surprised by how much light seedlings want. Outdoors they want a protected spot with full sun, like a greenhouse or cold frame. Indoors, they want a window with 8+ hours of full sun, or a proper grow light for 14 hours a day.
Some seeds will only germinate in the light, and must be planted on the surface. Others only sprout in the dark. Most don't mind either way. Your seed packet will tell you if your seeds have any special light requirements.
6. Heat
Most seedlings will grow just fine at moderate indoor temperatures, or even mild outdoor temps, but some are fussy about temperature. The most notorious are warm weather veggies like tomatoes, basil, and especially peppers. They will sprout happily at 75F, but will be sluggish or won't sprout at all at lower temperatures. Most nurseries sell waterproof heat mats to help get warm-loving seeds going. Or leave them over a radiator if you have one.
Other seeds need a period of cold to sprout. Called cold stratification, this process mimics winter. When the cold ends, the seed thinks it's spring and time to sprout. It sounds complicated, but is actually straightforward: Plant your seedlings in their containers and stick them in the fridge for about a month, making sure to keep them moist. When you take them out, leave them at room temp to sprout as usual.
Planting Seeds, Step-By-Step
Before you begin, take a moment to look up what conditions your seeds prefer (temperature, light requirements and whether to direct seed or sow indoors for transplant). It should be on the packet, or very easy to find online.
- Fill your containers with seed starting mix.
- Bury your seeds to the depth indicated on the seed packet.
- Water them in gently. A light sprinkling of water helps ensure that the seeds are in contact with the soil.
- Heat or cool if needed.
- Keep them lightly moist (about the dampness of a wrung-out sponge) and in bright light until 2-4 sets of leaves develop, or until you notice their growth slowing down. For some seeds this is a couple weeks, for others this can take several months.
- Transplant to a bigger pot, or out to the garden.
Pests, Pitfalls, and Troubleshooting
The most common problems with seedlings are due to water: Too much water and you get damping off, a fungal condition that looks like your seedling got squeezed at the base and tipped over. Too little water and seedlings dry out and die. Aim for lightly damp, but no more.
A good seed starting mix can also help: One that holds water well, but also drains can help even out irregular watering. If you live somewhere very dry, you might want to look for seed starting mixes formulated to hold extra water (usually with more coco coir, or sometimes polymers that hold water). If you live somewhere humid and damping off is a problem, you can add sand or perlite to your mix to let in more air.
Tall leggy seedlings mean not enough light.
Slugs are a common enemy of the seedling outdoors. The best solution is to go out in the evening with a flashlight and pick them off your containers.
Too little space can cause your seedlings to slow down and become stunted. If your seedlings are crowded together (leaves touching is a good indication of over-crowding), lift them out, separate them gently, and re-plant with more space.
Shock is caused when a plant's conditions change too abruptly, and growth dramatically slows. Before transplanting from indoors to outdoor beds, harden them off by gradually introducing them to the outside. Leave them outside in a sheltered spot during the day for a few days, but bring them in at night. Then leave them out at night too, but still sheltered from wind, for a few more days. They'll grow much more happily in the ground if they're already used to the weather.
Healthy strong seedlings resist pests and diseases fairly well on their own. I like to give mine a boost with a feed of a dilute organic fertilizer (kelp emulsion generally) once they have 3-4 sets of leaves, and then weekly after that until they're planted in their final spot.
Hi Anne,
I received my order today and I’m over the moon! More beautiful than I imagined. They’re art!! Your products are lovely and your team is amazing. Packaging is beautiful and so carefully done. Your company will be growing faster than I can start my seeds – enjoy the ride!! You all deserve it!