Last Saturday, no fewer than three separate people (within hours of each other) all asked me the same thing: "How do I get started growing my own vegetables?" Followed by, "Just the absolute minimum basics please, I don't have the energy right now for anything complicated." We're all feeling #pandemicgardening.
Here it is, your absolutely minimum basic guide to starting to grow your own.
This intro is divided into 4 basic types of veggies you might want to start with: Salad greens, herbs, tomatoes, and legumes.
All types of veggies and herbs do have some things in common, however, and we should get those out of the way right off the bat.
Soil
First, let’s distinguish between potting soil and soil. Not at all the same thing, and you should know which one you're using before you start.
Soil Soil

What it is: Soil is the naturally occurring stuff you’ll find if you dig a hole in the ground.
How to plant in it: Start by pulling out the weeds and digging the space you intend to plant.
(For those with kids, digging may be the whole point. You can also turn this into a project and build raised beds to contain the soil once dug - it will take up more space after digging. But it's not necessary, and those can be added later.)
If the soil is so soggy wet that it sticks like dough to your shovel, wait a day or two and try again. If it is dry and dusty, water it thoroughly and wait a day for the water to penetrate.
Break up the clumps to a depth of a few inches to a foot or so. Rake the top until it’s smooth and free of clumps bigger than a marble, or better yet, a pea. You’ll be left with a loose crumbly material that’s ready for seeds and a mind that's a little calmer from the exercise.
If you have it, now would be a good time to amend the soil with compost, chicken manure, worm castings, or whatever is locally available -- ask your nursery or landscape supply. Mix it into the top several inches of soil and rake smooth.
If you can’t get any amendments, don’t fret. You can plant anyway, and enrich the soil over time. Your plants will improve as you go along. (Don't add uncomposted materials like food scraps, orange peels or kitty litter. They won't help and can spread disease. The only exception is coffee grounds; they're ok on their own.)
Soil safety warning: Some urban or formerly industrial sites can have lead contamination in the soil. When in doubt, don’t plant in the soil, or get a soil test. There are plenty of government agencies that will test your soil for a modest fee. You send them a baggie of soil and they’ll tell you if there is lead.
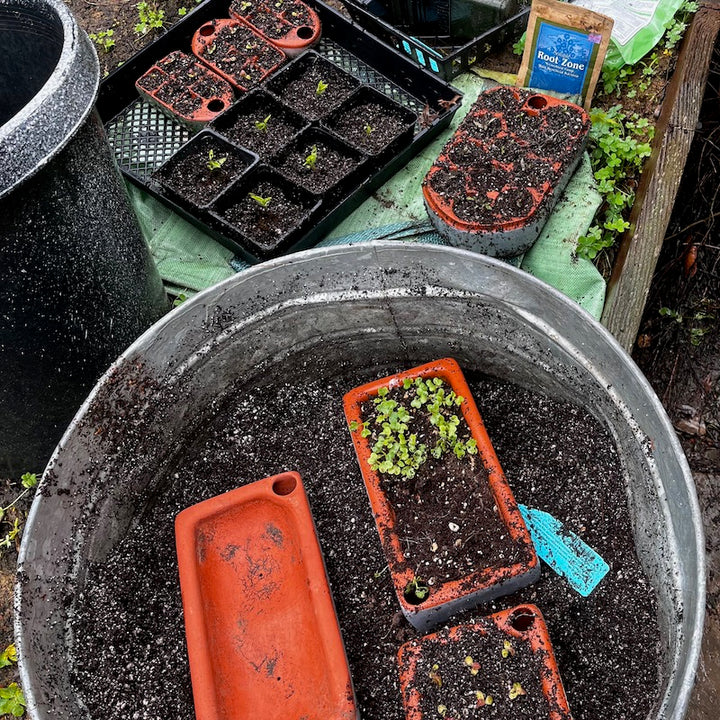
Potting Soil

What it is: Potting soil is a blend of ingredients formulated for plants to grow well in containers and does not contain any actual soil. You can buy it by the bag at the nursery or by the cubic yard from your local landscape supply, or make your own. Recipes and quality vary widely. Because it’s hard to ship, it tends to be based on locally abundant ingredients. Ask your local nursery which brands they like, or do some tests for yourself to see what gives the best results at your house.
Watch out for peat moss. It’s a main ingredient in many potting soils, but is very environmentally destructive. Peat is mined from ancient bogs at a rate far faster than it can regenerate, and releases copious CO2 in the mining process. Avoid it if you can.
How to plant in it: Fill a container with it, anything from a flower pot to a raised bed, and you’re good to go.
Note: Do not fill containers with soil soil. It causes all sorts of problems. Use potting soil for containers.
Location
The space you have available will dictate what you can grow. Choose which one you have:
Outdoors, direct sun for at least ¾ of the day: You’re good for salad greens, herbs, tomatoes, and legumes.
Outdoors, direct sun for ¼ - ¾ of the day: Focus on salad greens, annual herbs, and peas (legumes)
Outdoors, deep shade only (no direct sunlight): Look for a different spot.
Indoors: Choose a window with 5+ hours of direct sun, or get a grow light, and focus on salad greens and annual herbs. Specialty dwarf tomatoes are trickier, but can work with enough light.
Salad Greens
 These mizuna seedlings are sprouting about 5 days after being planted directly into the ground.
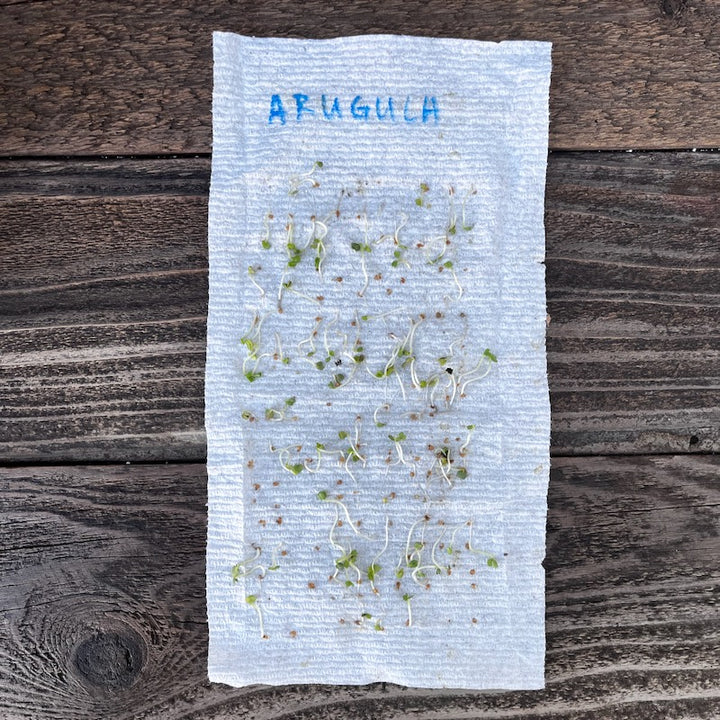
- Choose the right varieties. Start with arugula, mizuna (a green like arugula, but a bit easier to grow), or a “loose leaf” lettuce variety (seed companies will note which lettuces are loose leaf). All of these are “cut-and-come-again” meaning that you pick leaves when you want them, and the plant will regrow more leaves over a long season. You can plant all these greens separately or together, or choose a seed mix. There are lots of cut-and-come-again salad seed mixes that work well.
- Plant where they will grow. No need to start salad greens indoors (though you can to get a jump start on the season if you prefer). In your prepared in-ground bed or container (allow 6” minimum diameter per plant), run your finger along the surface to make a tiny trough. Sprinkle seeds thinly (about one seed every inch or two) into the trough. Close the trough. Mark where the trough is, and what you planted.
- Gently water daily until they sprout, about a week or two.
- Keep your greens watered, and pull out any weeds that will compete with your salads. Here's a tip: To distinguish between weeds and greens early on when they're sprouting, plant a few seeds indoors in potting soil and watch them sprout -- that way you'll know what the good guys look like.
- Thin out the plants leaving one about every 6” when they get to be about 2" tall. Eat the ones you pull out for your first salad!
- When plants are about 8” tall, start harvesting by cutting off leaves. The plant will regrow again and again over about a 6-8 week season.
- To keep a steady supply of salad, plant a new batch of greens in a new spot every 2-3 weeks so that as one batch tapers off, the next one is going strong.
You can buy lettuces and arugula as starts at the nursery, but if you can be patient, plants started from seed in the ground, or seedlings you have grown yourself generally perform much better over the long term. Something about being accustomed to their home from the beginning helps them fend off pests.
Herbs
Herbs come in 2 basic varieties that require different growing:
- Annual Herbs: Short lived herbs that require watering
- Perennial Herbs: Long-lived herbs that thrive with low water

Annual Herbs: Basil, cilantro, parsley, dill
Basil and parsley are best started indoors in seed trays, or bought as starts. They can be hard to get going otherwise.
Cilantro and dill can be grown just like greens, above. (Though they can be slow to sprout, especially dill)
Once they’re planted, keep these herbs well watered, and harvest regularly. Basil suffers when it’s too cold. Cilantro suffers when it’s too hot. Dill and parsley aren’t fussy.
6” pot size minimum per plant, but they will grow bigger with more space.

Perennial Herbs: Oregano, thyme, sage, rosemary, lavender
All of these herbs can be quite slow and tricky to start from seed. If you’re patient, you can try starting them as cuttings (pictured above), or get starts from the nursery.
Plant them in full, blazing, all-day sun. Water them weekly to get them started, but once they’ve been in the ground a few months, they’ll be fine with only occasional water. If you live somewhere at all rainy in the summer, they will need no extra water. In Southern California, you might want to water every week or 2 when it’s really dry.
Shade and being cold and waterlogged will kill these Mediterranean herbs. Otherwise, they’ll live for many years.
Tomatoes
 These tomato seedlings are the same age, but one is normal and the other is a dwarf variety that could do well indoors. Even at just 6 weeks old you can really see the difference! Both will produce cherry tomatoes, but the dwarf will only grow to 12" tall while the regular plant will get 4-5 feet tall.
The classic grow-your-own plant, tomatoes are tough plants provided you follow some guidelines:
- Plant at the right time of year. They should be planted outside in truly warm weather, with enough warm weather left to reach maturity, 2-3 months from transplant. In Southern California, that can be as early as March and as late as July. In cold places the window is generally a few weeks in late spring.
- Start seeds indoors about 8 weeks before planting out, or buy vigorous-looking nursery starts at planting time.
- Plant them deep. Bury the stems of transplants about halfway up. They'll grow more roots from the buried stem.
- Water them deeply, regularly, and infrequently. Deep watering means a lot of water, slowly, all in one go (like leaving a dripping hose on the tomato for an hour) once a week rather than a light sprinkle daily.
- Give them as much sun and heat as you possibly can.
- In containers, give them at least 5 gallons, unless you’re growing a super dwarf variety. (Those are unusual, and will be clearly marked.)
- In the ground, space them 18” apart.
- Stake them with tomato cages, or any homemade structure you like.
- Fertilize with liquid organic fertilizer about once a week through the growing season.
Legumes

Peas are the legumes to grow in cool weather and can tolerate a some shade (and they make the prettiest flowers), beans are for warm weather. Otherwise, treat them more or less the same.
- Poke peas and beans directly into the ground, about an inch down, and keep them watered until they sprout. Space them in groups of 2-3 seeds about a foot apart.
- Plant peas in cool fall and spring weather. Plant beans as soon as soil feels warm to the touch, when it’s truly summer.
- Give them something to climb up that’s 5-8 feet tall. Beans will wind up a pole, but peas need supports with more texture to grab on to: a lattice, net, or a twiggy stick will all work. (Bush beans don’t need support, the name says it all.)
- Choose varieties that you like to eat: sugar snap peas or shelling (English) peas, green beans or shelling beans to dry and simmer into chili.
- They will tolerate a bit of drought (for a vegetable), but do best when watered regularly.
Finally, a note on pests. Expect to loose a good portion of your harvest to pests. You'll be pleasantly surprised if you don't. Strong, healthy plants are your best defense against damage of all types (except perhaps mammalian - fences and cages are best for those critters). And as you go along, you'll get better at it.
Avoid using "'cides" of any kind. They are all poisons that are not acutely toxic to humans (though many are being shown to be cumulatively toxic), but will kill indiscriminately in your garden. From pollinators to the mycorrhizal fungi that feed your plants, your garden will be cleaner and healthier when you don't introduce poison.